In summary:
- Transform a corner of your kitchen into a designated “Lab Zone” using a simple, low-cost kit to contain messes and focus behavior.
- Prioritize safety by choosing age-appropriate reactions and understanding the correct disposal methods for each material to prevent plumbing disasters.
- Frame every step, from setup to cleanup, as part of the scientific process to turn “playing” into a structured lesson in hypothesis, observation, and resource management.
- Schedule experiments strategically based on your child’s energy levels and your own patience to ensure the experience remains fun and educational for everyone.
The vision is a familiar one for any parent wanting to encourage STEM learning: a kitchen counter shimmering with the aftermath of a slime experiment, or a volcano’s foamy residue creeping towards the floor. The desire to spark scientific curiosity is strong, but the fear of chaos, permanent stains, and potential danger is stronger. Many parents arm themselves with common household items like vinegar and baking soda, ready to create a “fun learning opportunity,” but they often lack a crucial component: a system.
Standard advice often stops at “supervise your child” and “cover your surfaces.” But what if the key to successful, stress-free kitchen science wasn’t just about managing the mess, but preventing it through a structured process? What if you could adopt the mindset of a scientist to transform a corner of your kitchen into a temporary, professional-grade ‘lab zone’? This approach is not just about safety; it’s about making the process itself the primary lesson. After all, a 2023 SafeHome study on child safety found that 55% of household injuries could have been prevented with better childproofing and proactive measures.
This guide provides that system. We will move beyond just listing experiments and instead offer a complete protocol for establishing, running, and decommissioning your kitchen lab. You’ll learn how to create behavioral boundaries that make learning more effective, how to turn cleanup into a science lesson, and how to manage your ‘lab supplies’ efficiently. It’s time to replace anxiety with a plan and turn your small kitchen into the safest, most exciting laboratory on the block.
text
This article provides a comprehensive framework for creating safe and effective science zones in your kitchen. The following summary breaks down the key strategies, from choosing the right experiments to implementing smart storage solutions.
Summary : Your Guide to Creating a Safe and Tidy Kitchen Science Lab
- Vinegar & Baking Soda vs. Hydrogen Peroxide: Which reaction is safe for a 6-year-old?
- The $10 investment that saves your dining table from permanent stains
- How to turn “playing with slime” into a lesson on hypothesis and observation?
- Why you should never pour cornstarch down the drain after an experiment?
- When is the best time of day to do messy science with high-energy kids?
- The “Zone Method” mistake that makes cooking take 10 minutes longer
- The predictive maintenance error that leads to replacing parts too early
- How to Double Your Kitchen Capacity with Smart Storage Solutions?
Vinegar & Baking Soda vs. Hydrogen Peroxide: Which reaction is safe for a 6-year-old?
The first step in setting up your kitchen lab is a risk assessment of your materials. Not all “simple” chemical reactions are created equal, especially with young children. The classic baking soda and vinegar volcano is a rite of passage for a reason: it’s incredibly safe. The reaction produces carbon dioxide gas (the same gas we exhale) and a harmless saline solution. It’s a fantastic, hands-on experience for children as young as three, allowing them to mix the ingredients themselves with minimal supervision.
On the other hand, experiments involving hydrogen peroxide, even the common 3% household solution, require a higher level of caution. While it can produce exciting “elephant toothpaste” foam, the reaction releases pure oxygen, a stronger oxidizer. The reaction can also generate heat and should be demonstrated by a parent rather than performed by a young child. For a 6-year-old, the potential for eye irritation or ingestion makes it a less suitable choice for independent exploration. The goal is to build confidence, and starting with the safest possible materials is paramount.
This clear risk assessment, based on principles outlined in guides from educational experts like KiwiCo’s DIY resources, is your first safety check.
| Reaction Type | Safety Level | Byproducts | Supervision Needed | Age Recommendation |
|---|---|---|---|---|
| Vinegar & Baking Soda | Very Safe | CO₂ (same as we exhale) | Level 1-2: Child with supervision | 3+ years |
| Hydrogen Peroxide (3%) | Moderate Caution | Pure oxygen (stronger oxidizer) | Level 3: Parent demonstrates | 8+ years |
Ultimately, choosing the right reaction is your first, most critical step in establishing a safe and positive scientific environment.
The $10 investment that saves your dining table from permanent stains
The single most effective tool for transforming your kitchen from a food-prep space to a safe “Lab Zone” isn’t expensive or complicated—it’s a designated, contained workspace. Creating an ‘Official Experiment Stage’ costs less than $10 and works wonders for both mess containment and behavioral focus. This small investment signals to your child that a special activity is about to happen, with its own set of rules and boundaries. A large silicone baking mat provides a non-slip surface, while an aluminum tray underneath catches any and all spills, protecting your table from the dreaded food coloring stain.
This isn’t just about physical protection; it’s a psychological tool. As one parent group noted, the act of laying down the “special mat” helps children switch gears and understand that the rules of the ‘Lab Zone’ are now in effect. The equipment becomes part of the ritual, reinforcing focus and making cleanup expectations clear from the start. Here is a simple shopping list to build your own portable lab station:
- Large silicone baking mat ($4-5) – provides a non-slip surface with raised edges
- Aluminum tray or baking sheet ($2-3) – contains spills and defines the experiment zone
- Pack of flexible cutting boards ($2) – creates multiple work stations for different ‘tests’
- Turkey baster ($1) – perfect for transferring liquids without drips or spills, acting as a giant pipette
- Oversized sunglasses ($1) – a fun and effective alternative to safety goggles for young children
Case Study: The Behavioral Power of a Designated Zone
Parents report that creating an ‘Official Experiment Stage’ with a special mat signals to children that ‘this is the science zone,’ helping reinforce rules and focus behavior. This psychological boundary transforms protective equipment into behavioral management tools, making cleanup expectations clear from the start.
By establishing this clear, contained area, you’re not just preventing messes; you’re teaching your child the importance of a prepared and organized laboratory environment.
How to turn “playing with slime” into a lesson on hypothesis and observation?
Slime is often seen as just a messy, fun activity. But with a slight shift in approach, that gooey playtime can become a child’s first real lesson in the scientific method. The secret is to move from random mixing to structured investigation. Instead of just making one big batch, frame the activity as a series of tests to create the “perfect” slime. This introduces the core concepts of hypothesis and observation in a way that a child can immediately grasp.
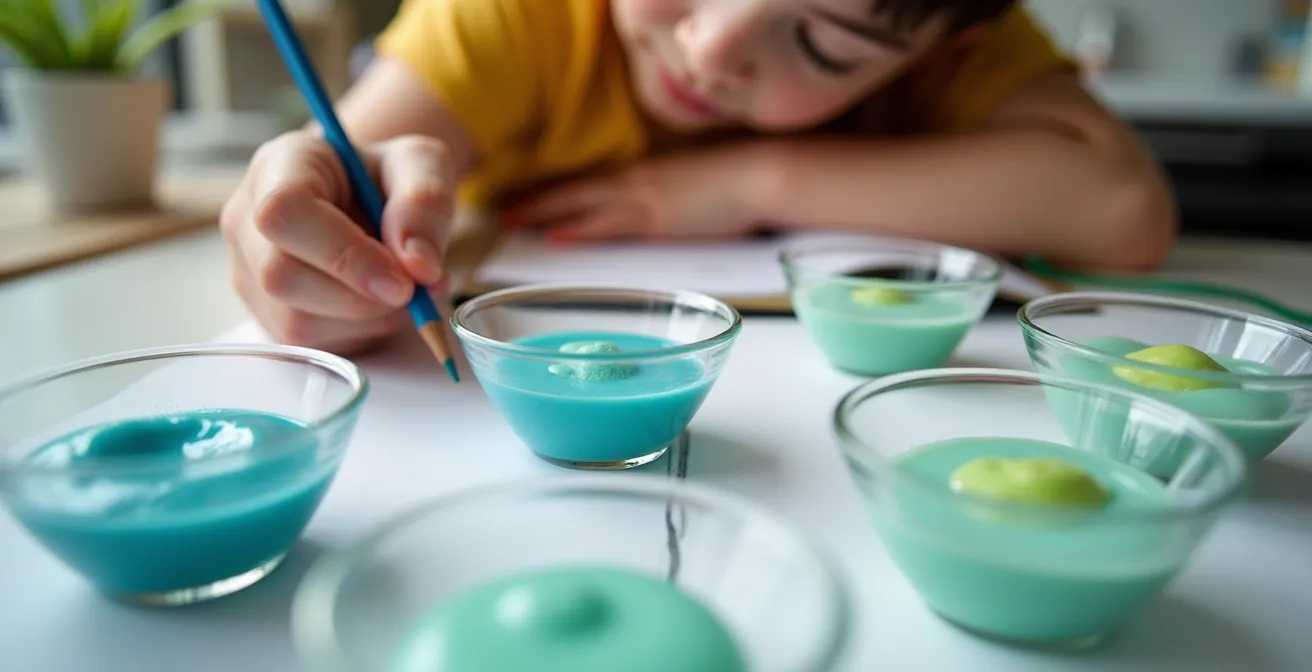
Before you begin, have your child start a “Junior Scientist’s Notebook.” Introduce the ‘One-Variable Rule’: for each new batch of slime, you only change one thing. Maybe you add a little more water, a little less activator, or a different type of glue. Ask them to make a guess first: “My Guess Is… (Hypothesis).” What do they think will happen? Then, as they mix, have them record their findings: “What I Saw & Felt… (Observation).” Is it stretchier? Bouncier? Too sticky? This simple process transforms them from a passive participant into an active investigator.
To make it even more engaging, you can turn the observation phase into the “Slime Olympics.” This gives them concrete metrics to test and compare, just like a real scientist would. The goal is to teach them that science isn’t about getting it right the first time; it’s about learning from each attempt. Here’s how you can structure the process:
- My Guess Is… (Hypothesis): The child predicts what will happen when changing one variable (e.g., “Adding more water will make it stretchier”).
- What I Saw & Felt… (Observation): They record the texture, stretch, and bounce characteristics of the new batch.
- What I Learned… (Conclusion): They begin to understand the cause and effect of changing ingredients.
- The One-Variable Rule: Emphasize changing only one thing per batch (more water, less activator, etc.) to get clear results.
- Slime Olympics Tests: Create fun challenges like the Longest Stretch, the Highest Bounce, or the Fastest Drip Race to quantify observations.
By applying this simple framework, you’re not just making slime; you’re cultivating a scientific mindset that values curiosity, testing, and learning from results.
Why you should never pour cornstarch down the drain after an experiment?
The science lesson doesn’t end when the experiment is over. In fact, the cleanup phase—or as we should call it, the ‘Decommissioning Protocol’—is one of the most critical parts, both for learning and for home safety. The kitchen can be a hazardous place; RoSPA data shows that 67,000 children experience accidents in the kitchen annually in the UK alone. A proper cleanup protocol minimizes risks and prevents costly household damage. The most common—and potentially most destructive—mistake is washing cornstarch-based mixtures like Oobleck down the drain.
Cornstarch and water create a non-Newtonian fluid, which means it acts like a liquid when poured slowly but becomes solid under pressure. When you force it down a drain, the pressure in the pipes can cause it to solidify, creating a clog that is incredibly difficult to remove. The proper method is to scrape the bulk of the mixture into the trash. The small amount of residue left can then be diluted with a large amount of water and safely washed away. This becomes a perfect teaching moment about the properties of different materials.
To avoid this and other common cleanup errors, follow a clear disposal protocol for all your science materials. To avoid this, follow a clear disposal protocol, as outlined in guides from trusted resources like Science Sparks.
| Waste Type | Disposal Method | Why This Method |
|---|---|---|
| Oobleck/Cornstarch Slurry | Scrape into trash, dilute remainder | Non-Newtonian fluid clogs pipes under pressure |
| Vinegar/Baking Soda Mix | Down drain with water | Already liquid, actually helps clean pipes |
| Slime | Trash only | Polymer bonds don’t dissolve in water |
| Oil-based experiments | Absorb with paper, then trash | Oil creates fatbergs in sewers |
Case Study: The Cleanup Experiment
Frame the cleanup as ‘The Disappearing Solid’ experiment. Parents report success when treating the dilution process of leftover cornstarch slurry as a lesson in solubility and states of matter, asking children ‘Where did the solid go?’ This transforms a potential plumbing disaster into an educational moment about how materials change when water is added.
By treating cleanup as the final step of the experiment, you reinforce the lesson and instill a sense of responsibility in your young scientist.
When is the best time of day to do messy science with high-energy kids?
Part of running a successful kitchen lab is strategic planning, and that includes scheduling. The “best” time for a messy science experiment depends less on the clock and more on energy levels—both your child’s and your own. Throwing a complex, focus-intensive experiment at a child who is tired and cranky is a recipe for frustration. Similarly, trying to manage a “Fizz-Bang” volcano when your own patience is worn thin is a no-win scenario. The key is Parent Energy Synchronization: choose a time when you are calm and have the mental bandwidth to be an enthusiastic, patient guide.
Thinking strategically about timing can transform the experience. The post-nap window is often a golden hour for focus, making it ideal for methodical experiments that require following steps. Conversely, the pre-bath hour is perfect for embracing the chaos of extra-messy projects, as the cleanup seamlessly transitions into bathtime. Quick, high-energy reactions are great for burning off that mid-morning steam. Aligning the type of experiment with your child’s natural energy patterns sets you both up for success.
Consider these strategic time slots to find the perfect window for your kitchen science adventures:
- Post-Nap Focus Window (2-4 PM): Children are often rested and ready for methodical tasks like careful measuring and observation.
- Pre-Bath Rampage (5-6 PM): This is the ideal time for extra-messy experiments involving slime or food coloring, as a bath is the next logical step.
- Mid-Morning Energy Peak (10-11 AM): Best for quick, exciting “Fizz-Bang” reactions like baking soda volcanoes that match a child’s high energy.
- Afternoon Calm Period (3-4 PM): Ideal for ‘Concoction & Creation’ experiments that require sustained focus, like building crystal gardens.
- Parent Energy Synchronization: Above all, choose times when YOUR patience levels are highest to ensure a positive experience.
By being intentional about when you conduct your experiments, you can maximize fun and learning while minimizing frustration for everyone involved.
The “Zone Method” mistake that makes cooking take 10 minutes longer
The “Zone Method” is fantastic for containing the mess of a science experiment, but it comes with a critical risk in a small kitchen: cross-contamination and clutter that bleeds back into your food prep areas. The single biggest mistake is not having a clear and immediate Lab-to-Kitchen Transition Protocol. Without one, science supplies get left out, sticky residue remains on the counter, and what should be a 5-minute dinner prep turns into a 15-minute hunt for a clean surface. This delay is a direct result of a failed ‘decommissioning’ of the science zone.
Establishing a swift, non-negotiable cleanup routine is essential for returning the kitchen to its primary function. This isn’t just about wiping things down; it’s about systematically clearing, cleaning, and storing all experiment-related materials so there is zero overlap with cooking. Using trays to contain experiments is the first step, but the 5-minute routine afterward is what truly prevents the 10-minute delay later.
Case Study: Preventing Zone Contamination
Research shows that clearly defining science experiment boundaries prevents cross-contamination with food prep areas. Using trays to contain experiments and establishing a 5-minute ‘decommissioning’ routine ensures the kitchen returns to its primary function efficiently, preventing the 10-minute delay often caused by scattered materials during dinner preparation.
This protocol ensures that your science fun doesn’t create cooking friction. It teaches order, responsibility, and respect for a multi-use space—all valuable life skills wrapped in a simple cleanup checklist.
Action Plan: The Lab-to-Kitchen Transition Protocol
- Clear All Materials: Place all experiment materials, tools, and creations into a designated “Lab in a Box” storage bin immediately after the experiment concludes.
- Wipe Surfaces: Use a damp cloth to wipe all surfaces within the experiment zone, removing any visible or sticky residue.
- Dry Surfaces Completely: Follow up with a dry cloth to eliminate slipping hazards and prepare the surface for food prep.
- Return Kitchen Tools: Any kitchen items used (measuring cups, spoons) must be washed and returned to their proper cooking-only storage areas.
- Store Science Supplies: The “Lab in a Box” is stored away from all food preparation zones, such as in a pantry or closet, to prevent mix-ups.
By making this transition protocol a non-negotiable part of every experiment, you ensure that science and dinner can coexist peacefully in even the smallest of kitchens.
The predictive maintenance error that leads to replacing parts too early
In the world of engineering, “predictive maintenance” means anticipating needs to avoid waste. In the world of kitchen science, it means not wasting half a box of baking soda on a volcano that could have worked with a fraction of the amount. A common error parents make is going too big, too soon. This not only wastes supplies but also misses a crucial teaching opportunity in resource management and scientific testing. The solution is to adopt the principle of the ‘Minimum Effective Quantity.’
Instead of starting with large measurements, teach your child to test in small batches first. Use teaspoons instead of tablespoons to gauge a reaction. This approach has two benefits: it dramatically cuts down on supply costs and it perfectly mirrors how real scientists work. They run small, controlled tests to find the optimal ratios before scaling up. This practice turns resource conservation into a core part of the experimental process.
Case Study: The Baking Soda Volcano Error
The ‘Baking Soda Volcano Error’ teaches children about resource management. Starting with small amounts (1 tablespoon each) to test reactions before using half the box demonstrates predictive testing principles. Parents report saving up to 75% on supplies by teaching kids to find the minimum effective quantities first, turning potential waste into a lesson on efficiency.
A simple supply management system can further reinforce this mindset. It helps you keep track of what you have, what you need, and how to make it last longer.
- Create ‘low-level warning’ markers: Place a rubber band on bottles of glue or vinegar at the halfway point, signaling it’s time to restock soon.
- Test small batches first: Always use teaspoons before tablespoons to gauge reactions and find the most efficient ingredient ratios.
- Maintain equipment properly: Wiping and drying mats, trays, and tools after each use prevents degradation and extends their life.
- Store materials correctly: Use airtight containers for powders like cornstarch or baking soda to prevent clumping from humidity.
- Track usage patterns: Make a quick note of which experiments use the most materials to help you plan your shopping better.
By teaching your child to think about efficiency and conservation, you’re imparting a valuable lesson that extends far beyond the kitchen table.
Key Takeaways
- The key to stress-free kitchen science is not just managing mess, but implementing a structured ‘Lab Zone’ protocol for setup, execution, and cleanup.
- Safety is paramount. Always start with age-appropriate reactions and teach correct disposal methods as the final, crucial step of any experiment.
- Transform play into learning by applying simple scientific principles like the ‘One-Variable Rule’ and testing for ‘Minimum Effective Quantity’ to foster a true investigative mindset.
How to Double Your Kitchen Capacity with Smart Storage Solutions?
The final piece of the puzzle for maintaining a peaceful coexistence between your kitchen and your science lab is storage. A small space can feel even smaller when beakers, bottles, and bags of cornstarch have no dedicated home. The solution is a centralized, portable system: the ‘Lab in a Box.’ This isn’t about finding more cabinet space; it’s about consolidating all your non-perishable science supplies into a single, easily accessible container. A clear plastic bin with a secure lid is the perfect headquarters for your program.
This approach instantly “doubles” your capacity because it removes clutter from valuable kitchen real estate. When it’s science time, you bring out the box. When you’re done, the entire lab is packed away, and your kitchen returns to 100% functionality. This system also prevents the dangerous mistake of confusing science ingredients with cooking ingredients. Clear labeling is non-negotiable. Everything in the box—from the salt container to the flour bag—should be marked “SCIENCE ONLY” to avoid any cross-contamination.
You can maximize your space even further by thinking vertically and repurposing common items. Here’s how to build the ultimate ‘Lab in a Box’ system:
- Use one clear plastic bin with a lid: This becomes the home for ALL non-perishable science supplies.
- Install an over-the-door shoe organizer: Use the pockets on a pantry door to hold bottles of food coloring, pipettes, and other small tools.
- Repurpose kitchen items: Old measuring cups become beakers, and a turkey baster makes an excellent, large-scale pipette. Keep these ‘science only’ items in your bin.
- Stack small food containers: These are perfect for storing completed experiments that you want to keep, like different batches of slime or growing crystals.
- Label everything clearly: Use a permanent marker to distinguish science supplies (flour, salt, oil) from their cooking counterparts to ensure safety.
By implementing a ‘Lab in a Box’ system, you’re not just storing supplies; you’re creating a sustainable process that makes scientific exploration an easy, repeatable, and welcome activity in your home.